Partly to do with my unhealthy obsession with glitter and the fact that I wear a red lip nine times out of ten, I envision my Christmas makeup looks months in advance- some say it’s sad, I say it’s savvy.
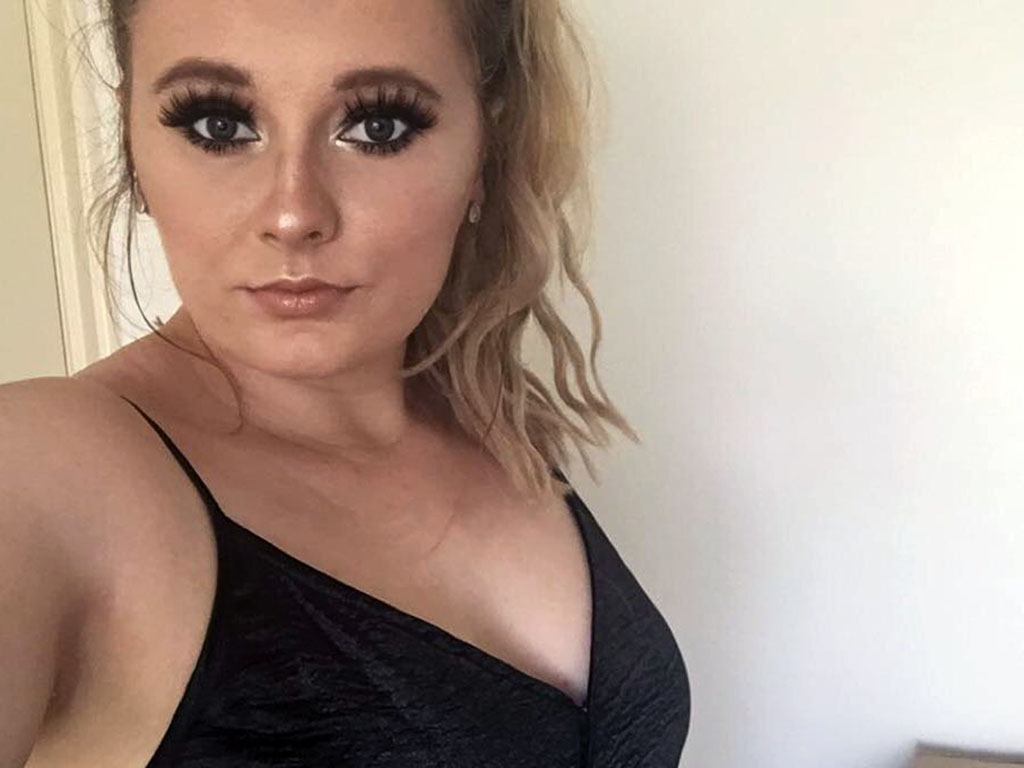
I am by NO stretch of the imagination a makeup artist; lets just make that clear. In saying that, makeup is one of my many creative passions and I quite like to experiment with different techniques.
I figured I’d share a couple of my little experiments with you throughout Blogmas to give you a few ideas and (hopefully) inspire some of your own.
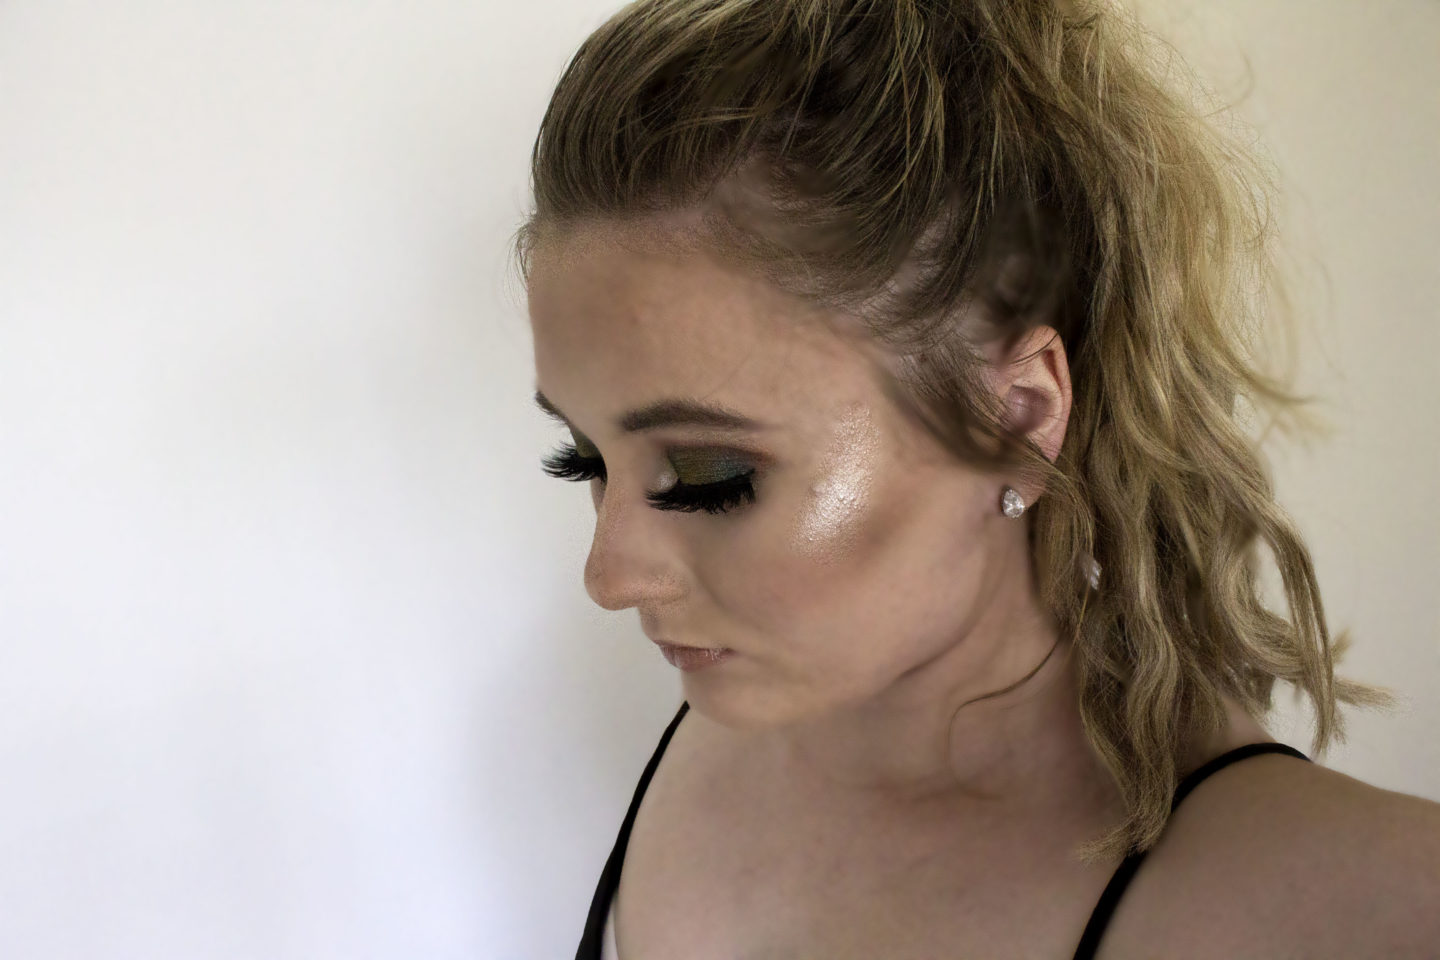
As not everyone likes to rock a bold lip, I figured my first tutorial might as well be something a little different and out of the box for me. Neutral smokey eyes are a popular choice during party season, but many people find introducing colour to be quite difficult.
In this look, I chose a deep green as opposed to the classic brown or grey smokey eye as I feel that as far as colour goes, it’s definitely the most subtle. The ‘halo eye’ effect has also been quite popular as of late and will work with just about any colour combination, so I figured I’d explain how to do it (the easy way) while we’re here.
If you aren’t into green, feel free to substitute it with any colours of your choosing.
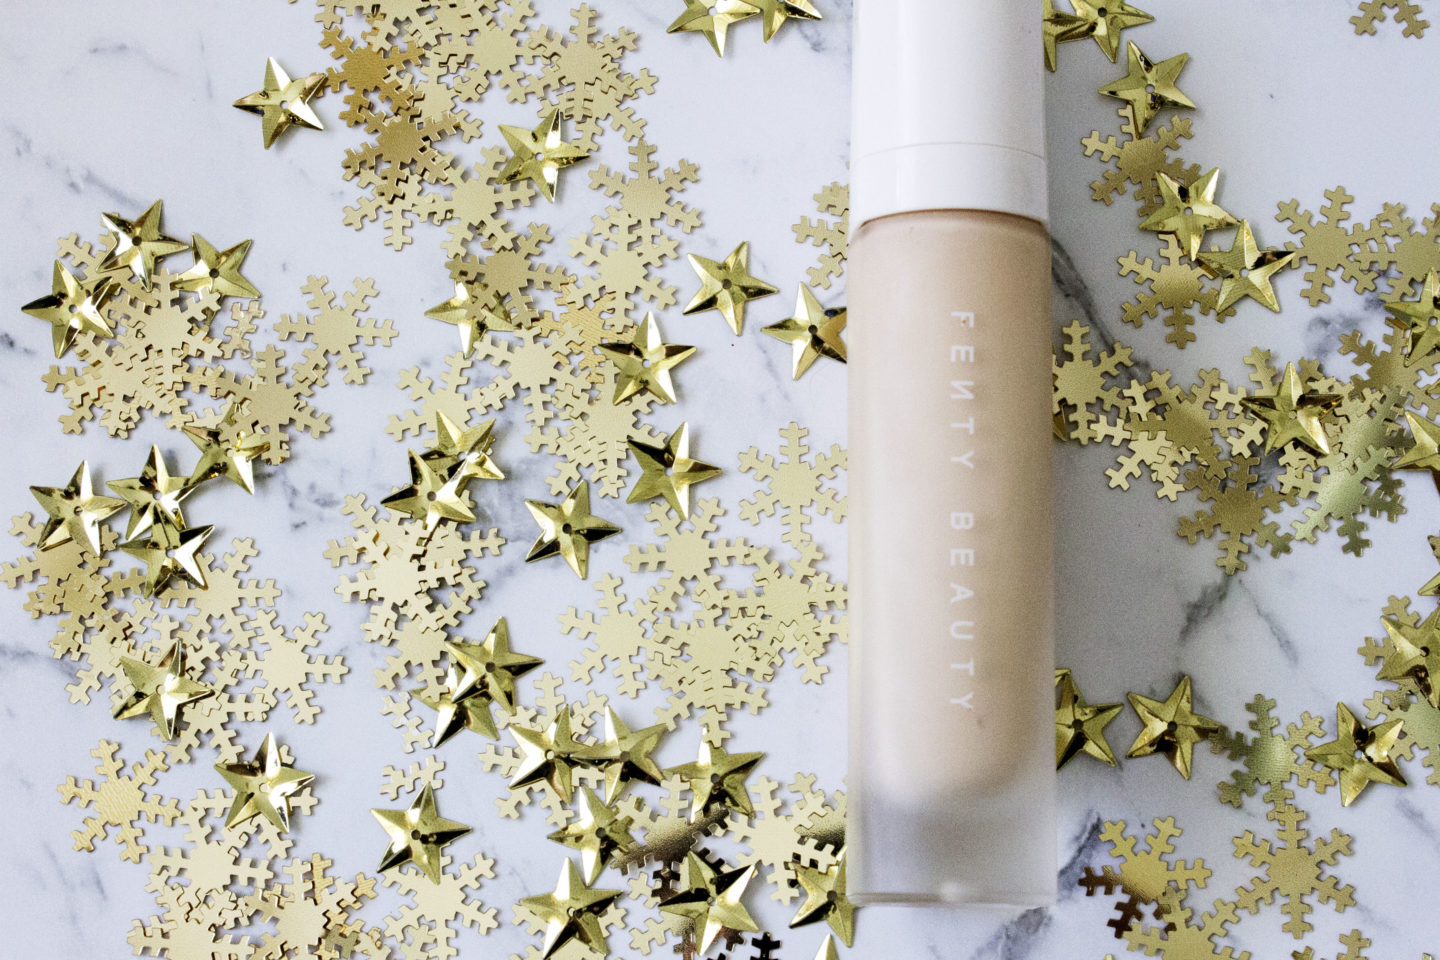
For this look, I wanted my skin to be somewhat dewy, but the most important part was creating a long lasting base.
To achieve this, I chose the Fenty Beauty Pro Filt’r Soft Matte Longwear Foundation as it has quite a natural matte finish and sits beautifully on all skin types.
If you have dry skin like me, I always suggest applying a good moisturiser around 30 minutes in advance to keep it hydrated, as this particular foundation can be slightly drying.
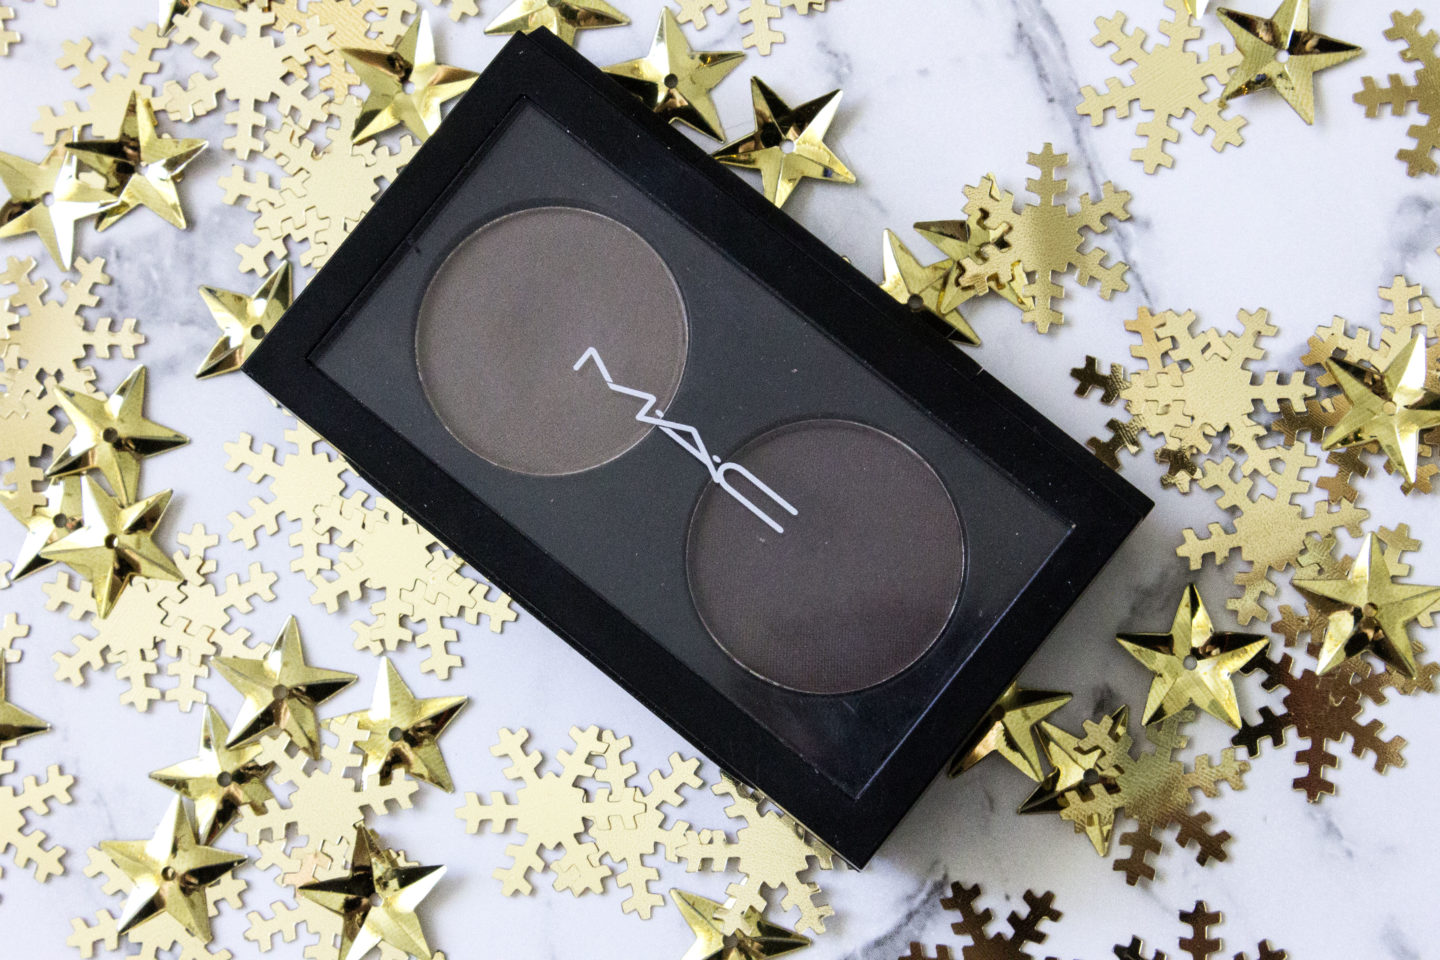
With heavier smokey eyes, I like to keep things balanced by creating a well defined and slightly more bold brow.
For this, I use the MAC Brow Duo in Brunette on a winged liner brush, keeping Coquette (the lighter colour) to the front and taking Brun (the darker colour) through the arch and tail.
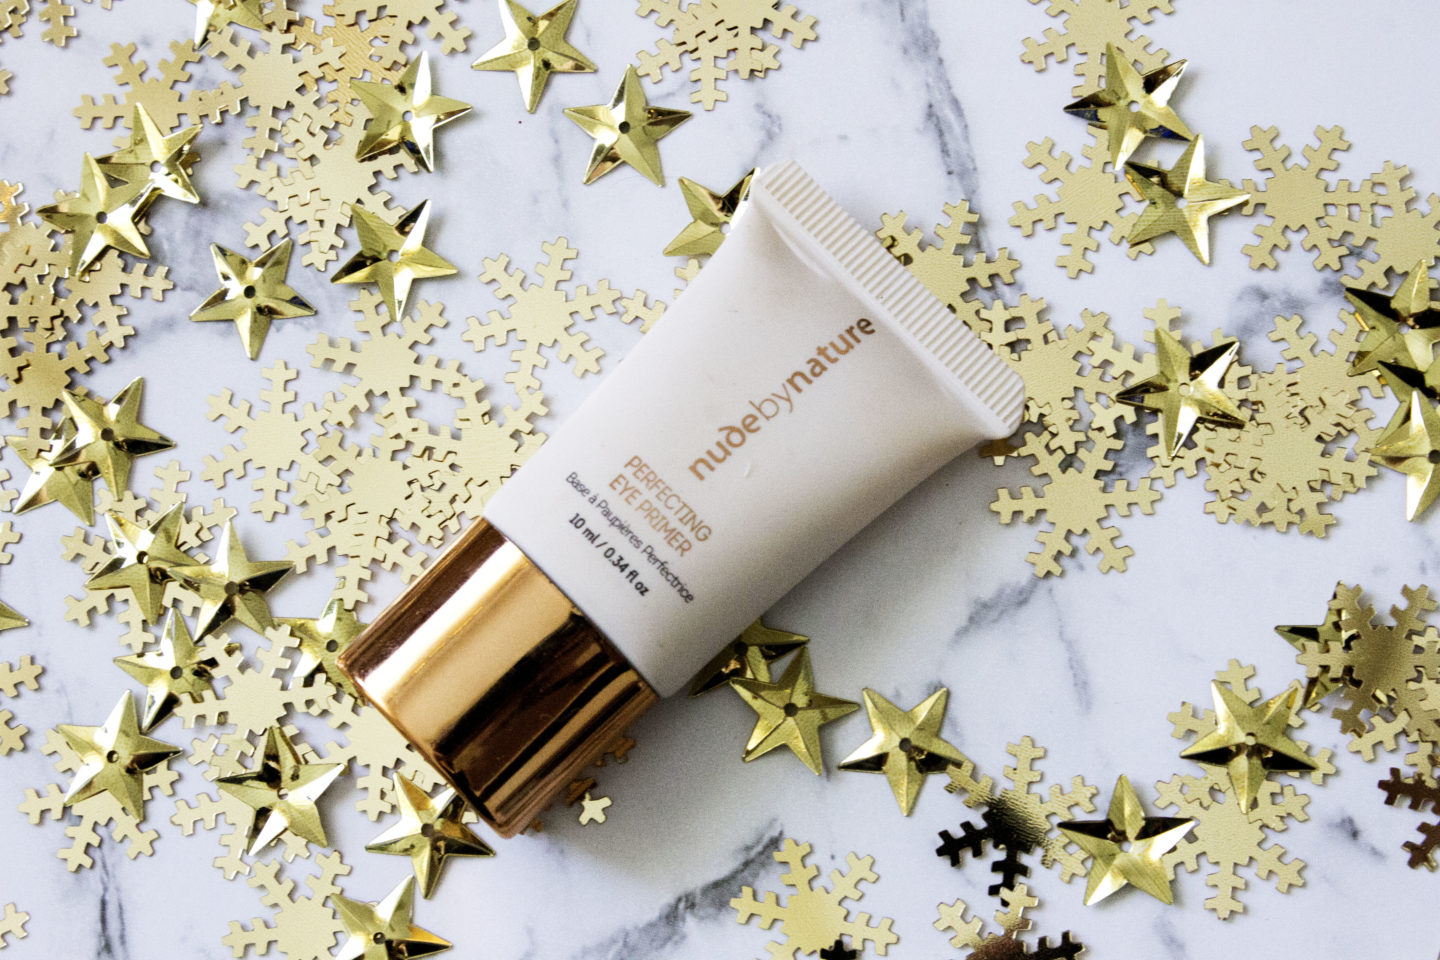
Eye prep is essential for this look, as a tackier base helps to keep the eyeshadow from creasing and fading throughout the night.
I love this Perfecting Eye Primer by Nude by Nature as it treats the eye area with soothing and anti-ageing ingredients while providing a smooth and even base.
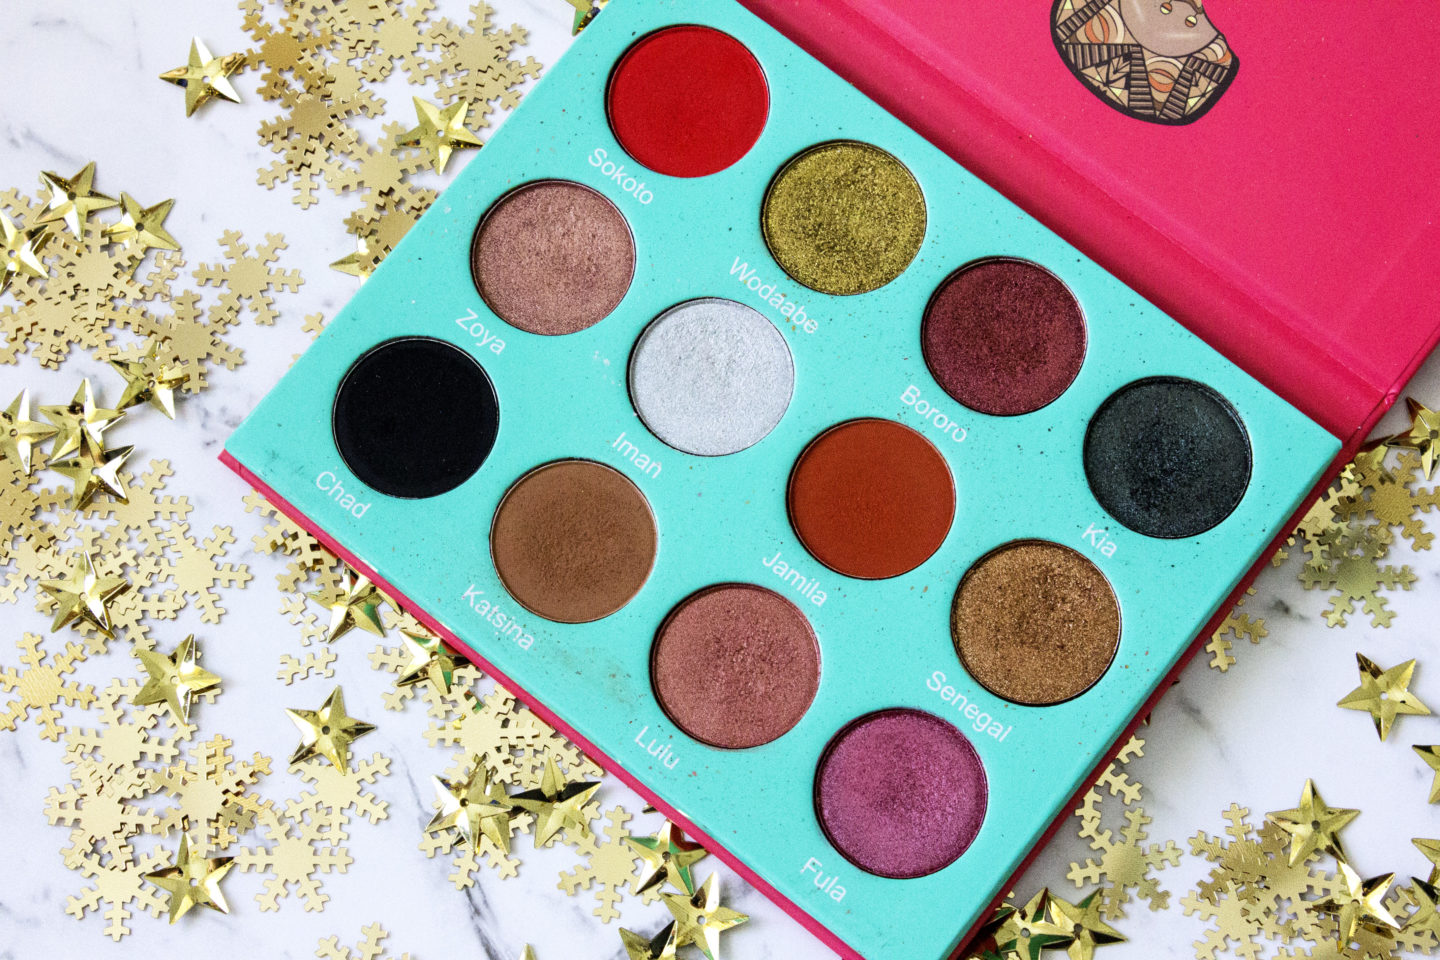
For the eyeshadow, I chose the Juvia’s Place Saharan Palette.
I started by building depth by taking Katsina through my crease, creating a slightly more rounded shape and softening the edges in the process. I also took a small amount of Jamila (orange) and blended it over the top to add warmth.
To form the base of the halo shape, I took a flat shader brush and packed Kia on the inner and outer thirds, keeping the centre of the lid and tear ducts blank. I then took the tip of the brush to connect the two thirds with a small amount of Kia through the centre of the crease. To complete the halo, I took Wodaabe on the same brush and packed it onto the centre, patting the excess over Kia to create a gradient.
On my lower lash line I took a mixture of Katsina and Jamila on an angled brush all the way along, and a small amount of Kia and Wodaabe in the same pattern as above.
While this shape isn’t particularly flattering on my slightly hooded almond eyes, it is an excellent choice for those of you with rounder ‘doe’ eyes, as it simply intensifies the existing shape.

Next, I concealed underneath my eyes with the Rimmel Match Perfection Concealer. I also used this to highlight and add shape to my face by dragging it into an upside-down triangle under the eyes, as well as on my chin, centre of my forehead and down the bridge of my nose.
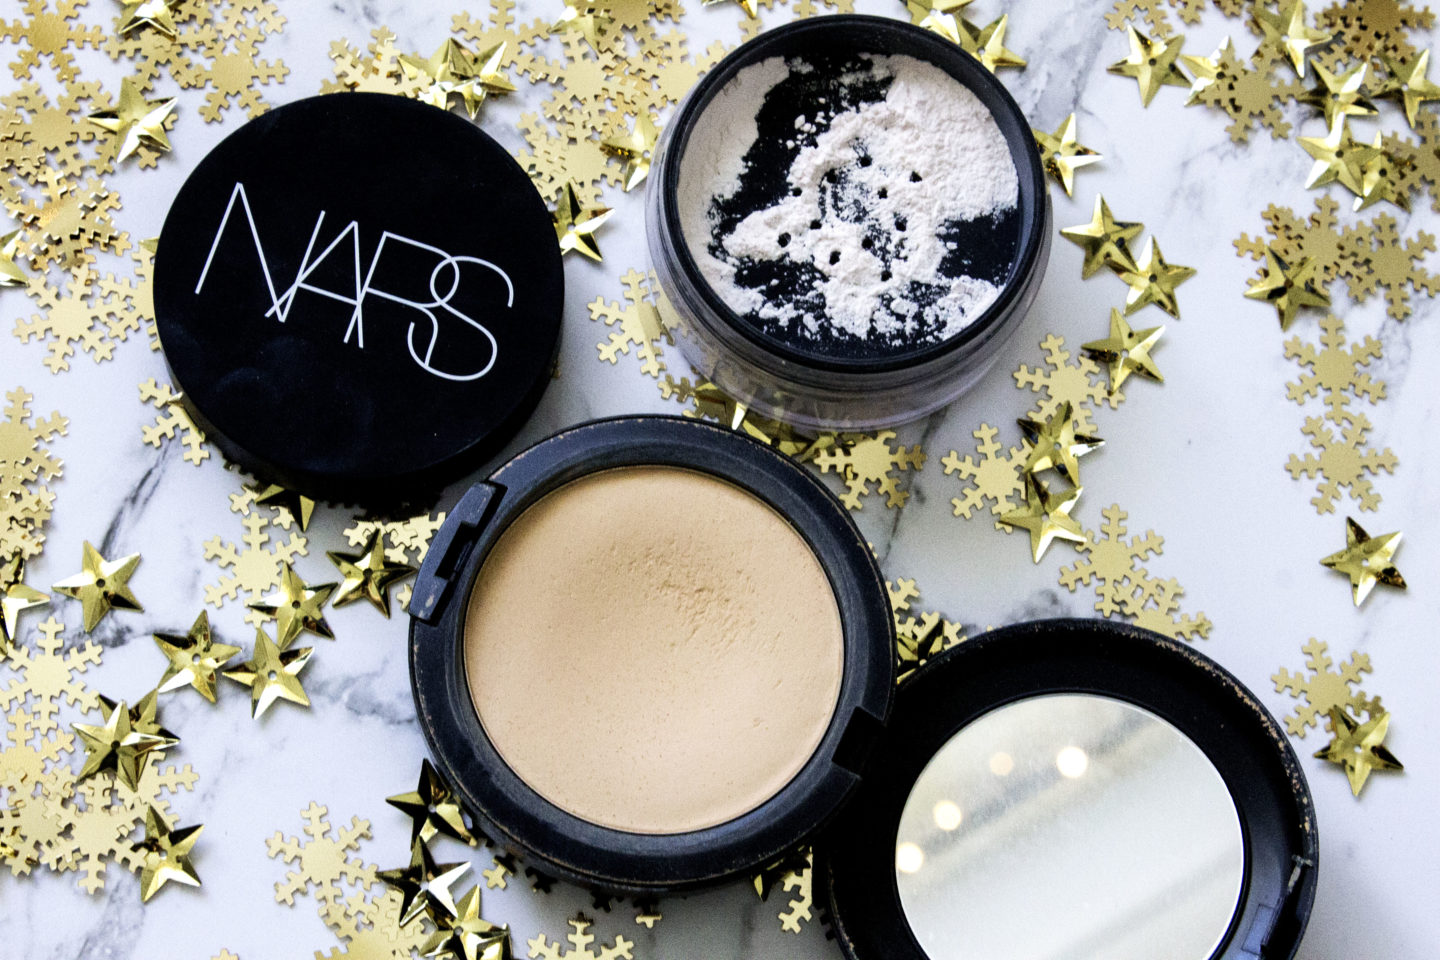
To enhance my face shape and keep the concealer in place, I also ‘baked’ under my eyes with the Nars Light Reflecting Loose Setting Powder. To do this, simply pack on the powder with a damp sponge and allow the concealer to absorb it for a few minutes before sweeping away the excess with a fluffy brush.
To set the remainder of my face, I used a tiny amount of MAC’s Studio Fix powder.
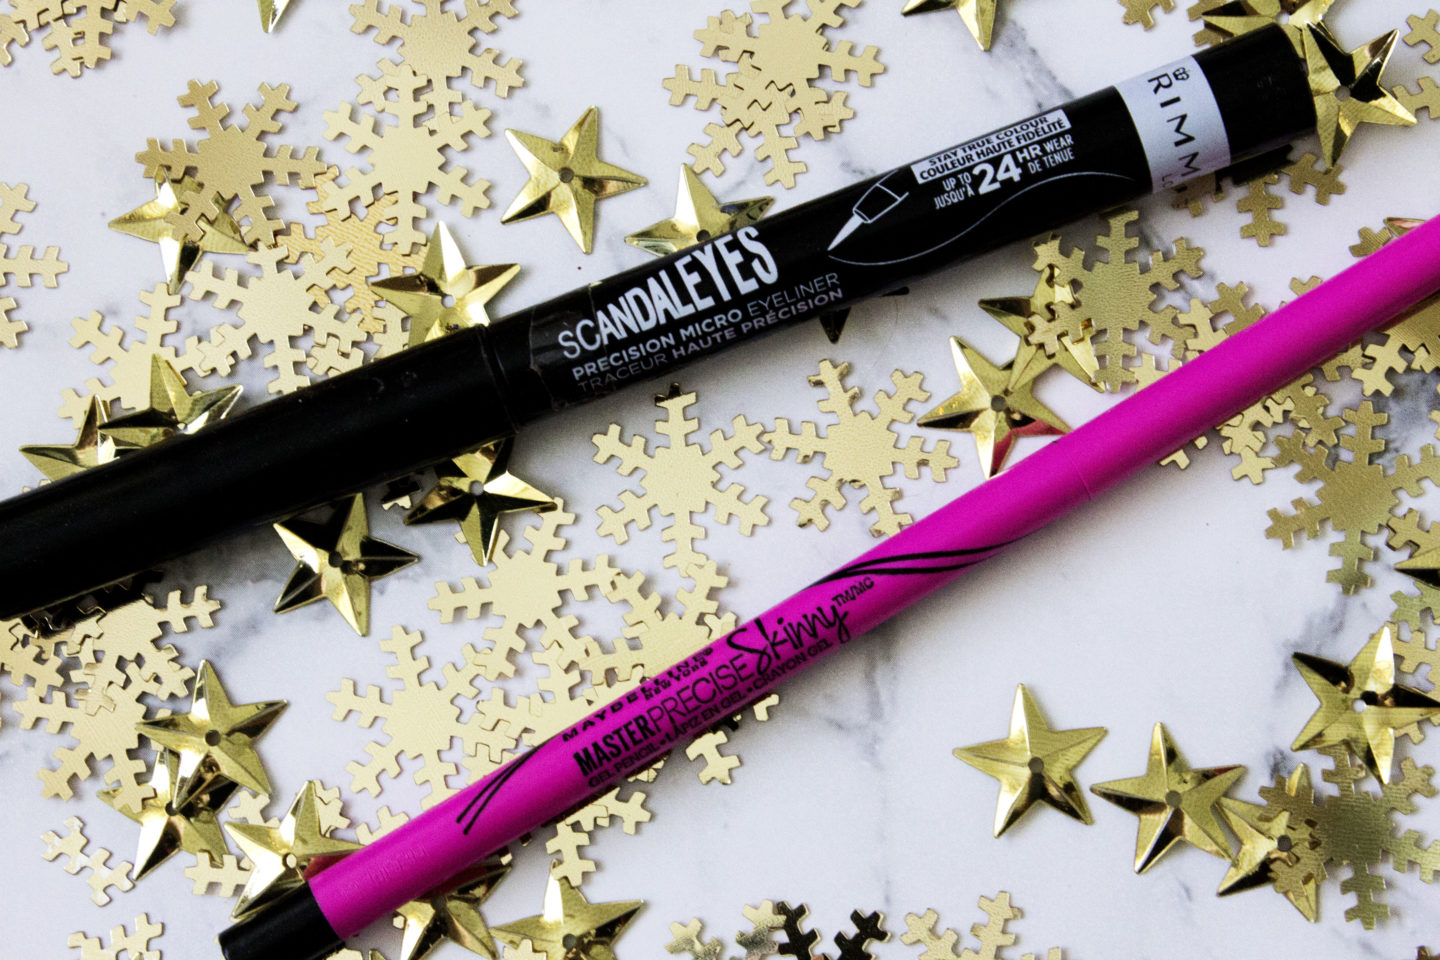
To amp up the drama and conceal the false lash band, I lightly lined my top lash line with the Rimmel Scandal Eyes Precision Micro Eyeliner.
I also lined the inner rim/waterline all the way around with the Maybelline Master Precise Skinny Gel Liner in Defining Black.
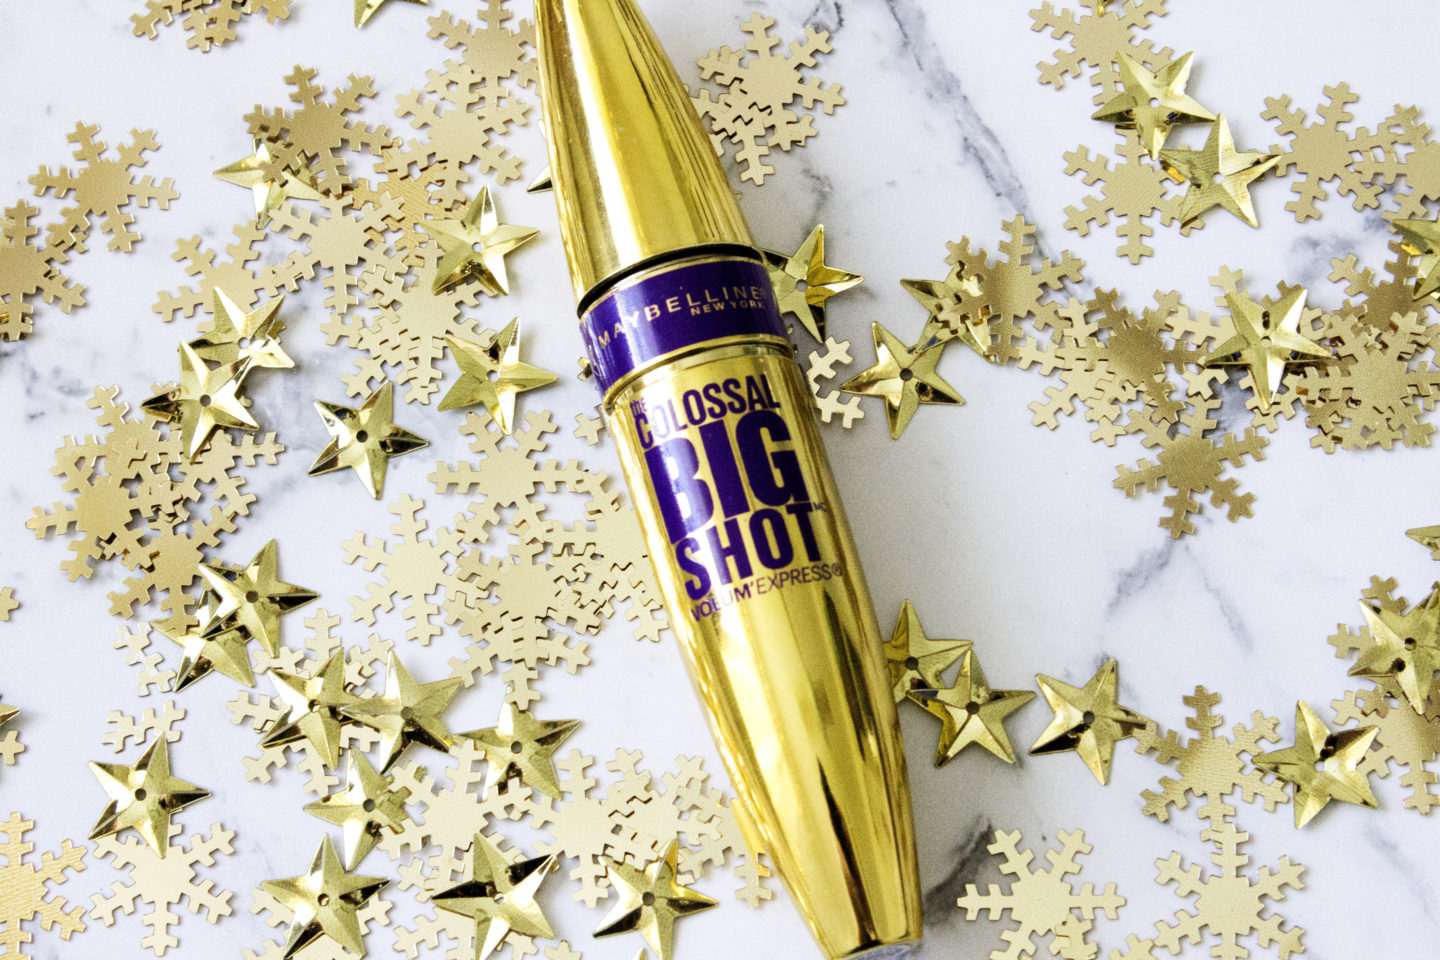
Any mascara will do for this look, but my favourite for creating dramatic, voluminous lashes is Maybelline’s Colossal Big Shot. I basically packed on two coats on my top and bottom lashes and this did all the work for me.
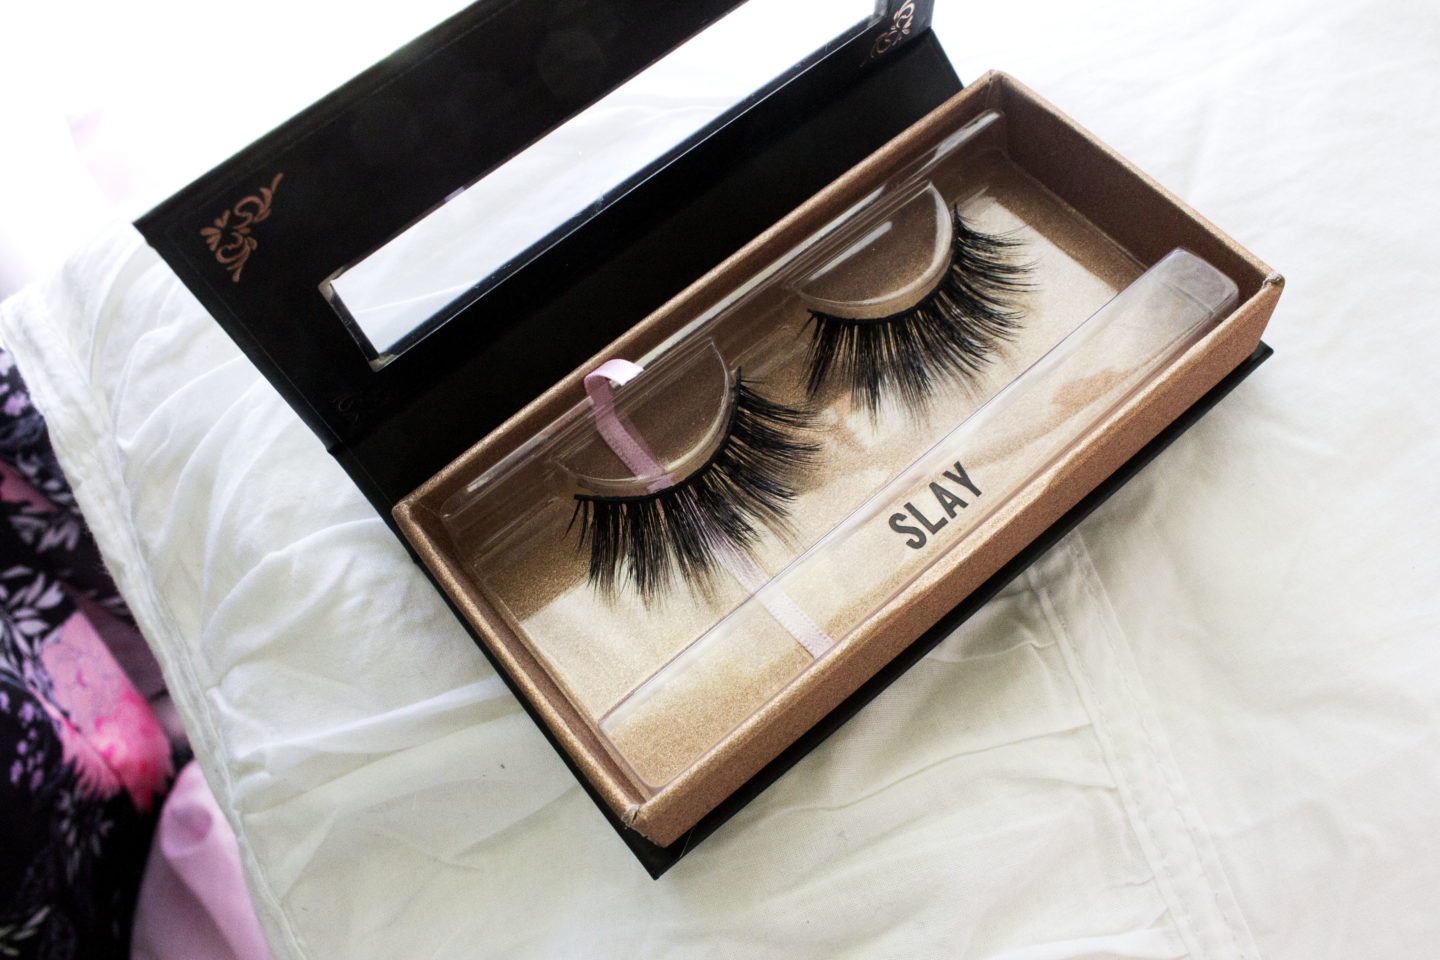
This step is totally optional, but I find that adding false lashes makes the world of difference in any look. They open the eyes, add drama, and if you choose the right ones, they can also completely change the shape of your eyes.
For this look, any lash will work but more rounded styles tend to look the best. I used the Dani Beauty Luxe Collection Lashes in ‘Slay’ which are incredibly dramatic and not for the faint hearted. Again, I personally prefer more winged styles on my almond eyes, but for this look, you can’t really go wrong.
As for application, lashes can be quite fiddly- especially when they’re this big. I find that not curling your own lashes makes a big difference, and looking down into a handheld mirror keeps the eyelid in a good position. Ardell’s Lash Grip adhesive is also my glue of choice- it doesn’t budge until you want it to.
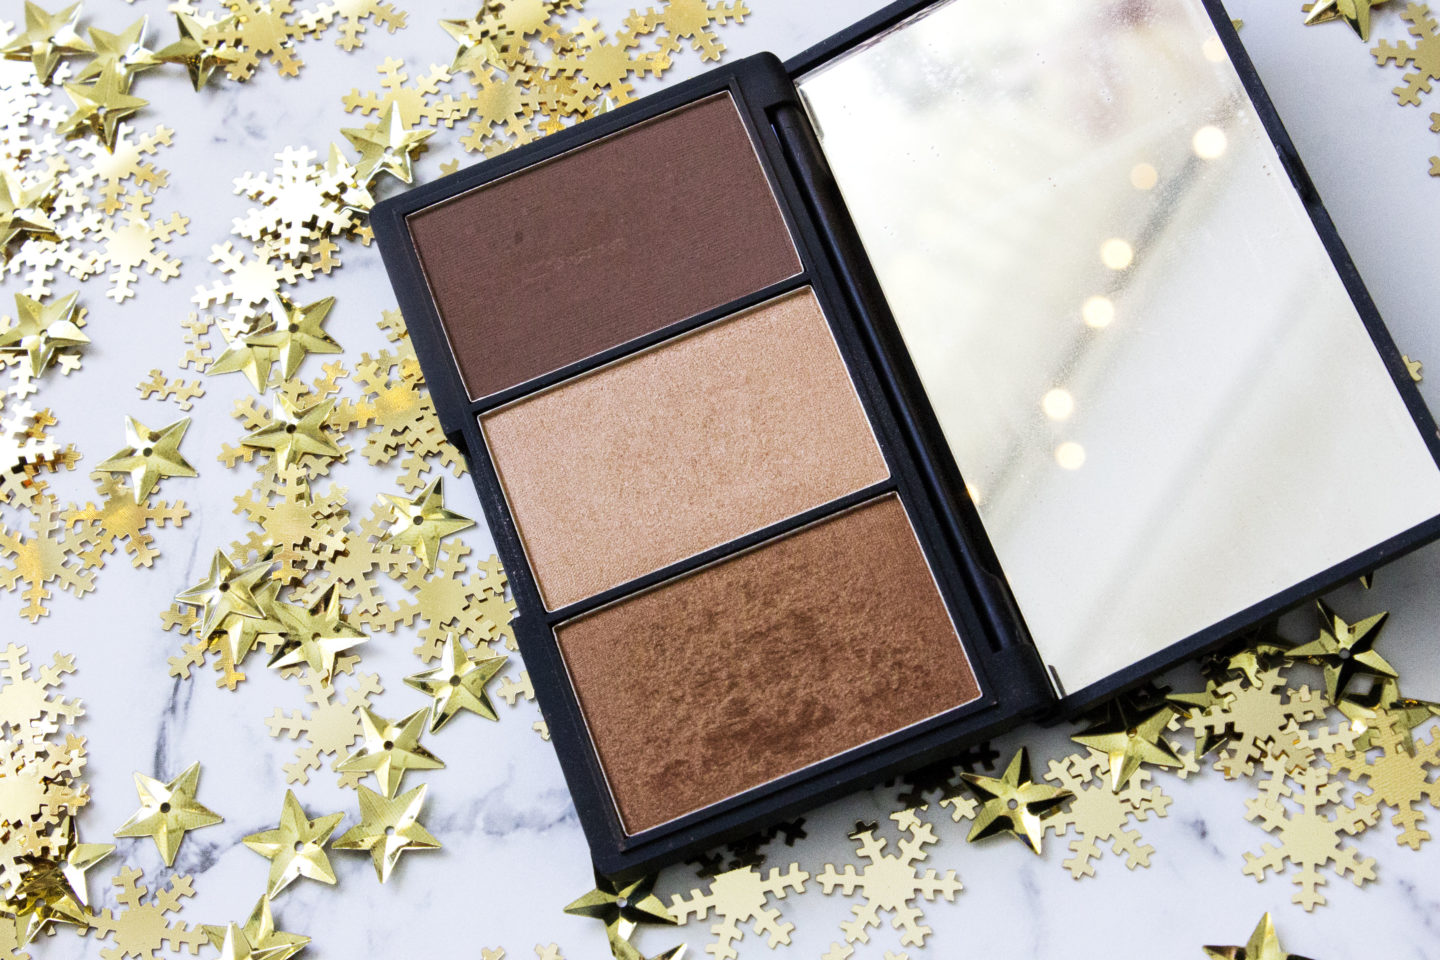
To add extra dimension to my face, I lightly contoured with the matte shade in the Sleek Face Form Kit in Medium.
My main tip for contouring cheekbones in particular is making sure to blend upwards rather than back and forth, as it stops the face from looking muddy and creates more of a youthful, lifted look.
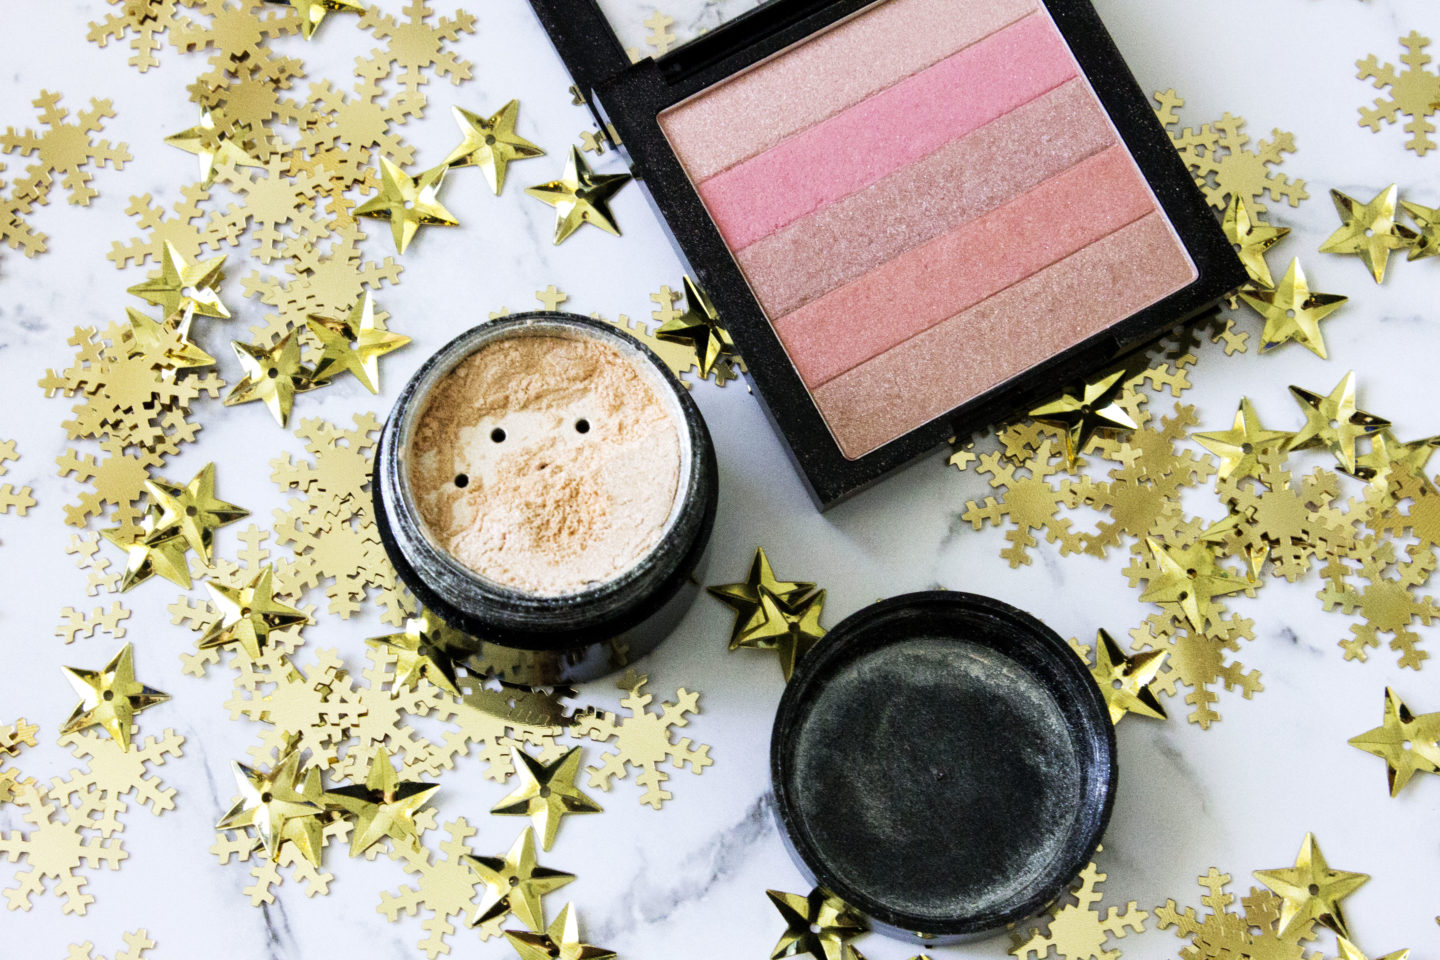
To add some colour to the face and enhance the glow, I used a small amount of Revlon’s Highlight Palette in ‘Rose Glow’ on my cheeks and on the middle of my nose.
And for my favourite part- THE GLOW- I used my ever-so-loved Kylie Cosmetics Ultra Glow in ‘Santorini’. As you can tell by the pictures, this stuff is INTENSE and a little goes a very long way so do be careful. I popped this on the tops of my cheekbones, above my eyebrows, the inner corners of my eyes, on my cupids bow and down the centre of my nose.
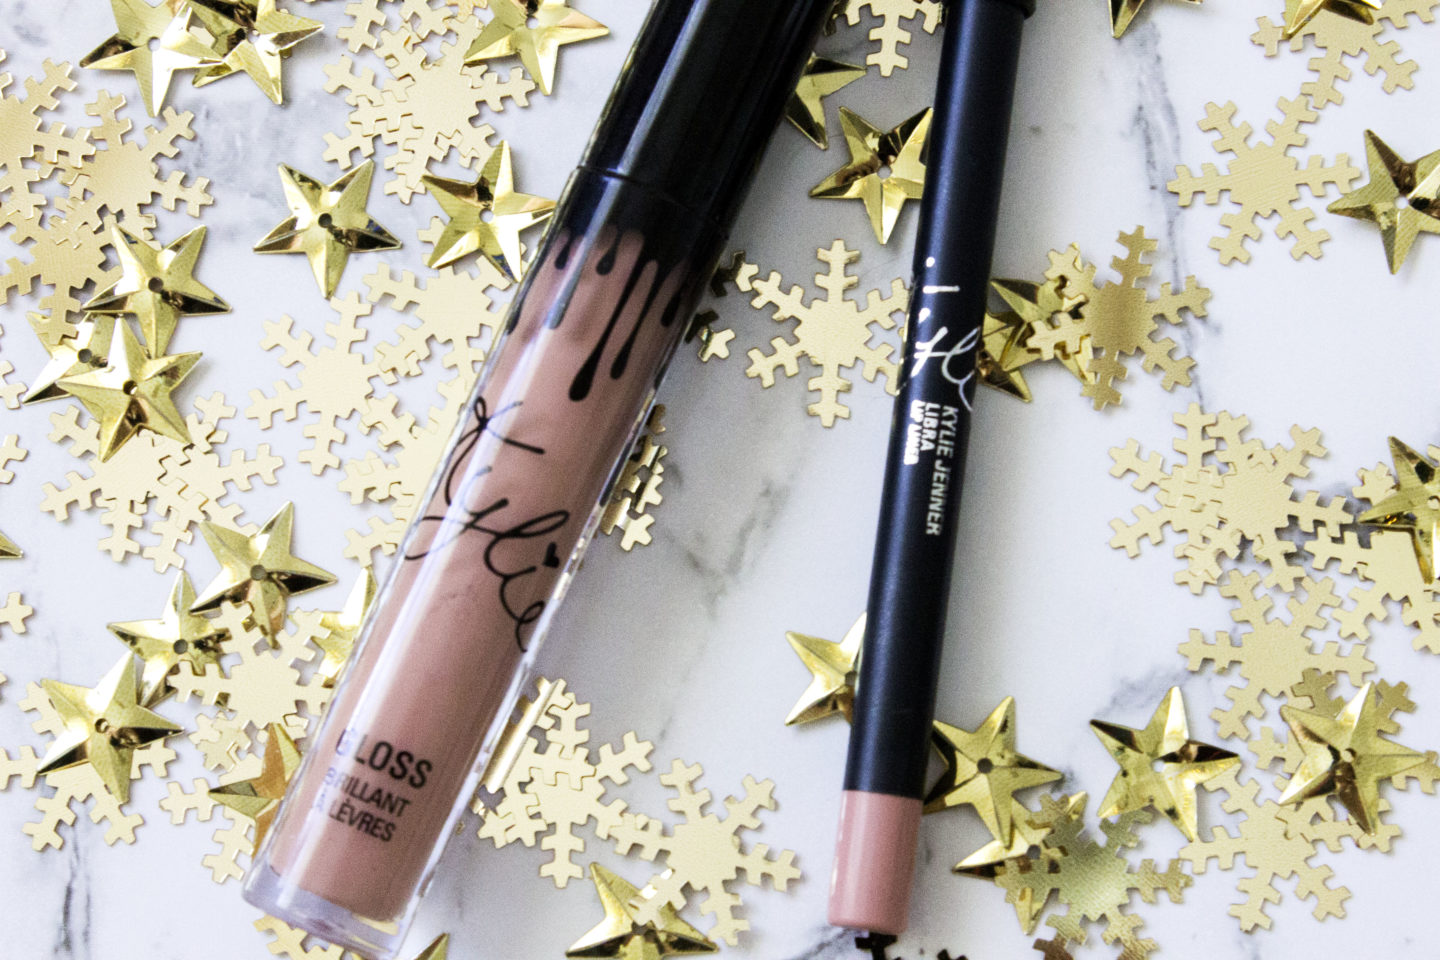
Finally, to finish off the look I used my new favourite nude lip combination; the Kylie Cosmetics lip liner in ‘Libra’ and Gloss in ‘So Cute’.
And there we have it!
If any of you recreate this look, be sure to tag me – @claire_ince – on Instagram as I’d love to see it!
Until tomorrow, 😉
NOTE: The images in this post have been lightly retouched to remove some gnarly mosquito bites. #SouthernHemisphereChristmasProblems.
